In the previous article, we created a fully functional URL shortener project in Django. However, in the current state, the project is more like a college hobby project. Let’s work on the project to further improve it. In this article, let’s aim to improve the UI/UX of the project and create a few more pages for various purposes such as:
- UI UX improvement: Let’s use Bootstrap to improve our website’s UI/UX experience. We will also create standard templates like the website’s header and footer.
- User Authentication: We will work on the user’s authentication.
- List Short URLs: Showing the list of short URLs created by the user.
- URL Analytics: Showing the number of times a short URL is hit.
- Expiration and Deletion: Implement functionality to set expiration dates for shortened URLs or allow users to delete URLs when they’re no longer needed.
UI UX Improvement:
We can typically divide our website into three parts:
- Header: It will display the navigation menu. It will also provide an option for users to sign up or sign in. We will create a header.html template to include a header on each page of the website.
- Website’s body which has the main content. We are going to create a template to generate this part dynamically.
- Footer: The footer typically displays the organization’s trademark and a few other pages such as Terms and Conditions, Privacy Policy, etc.
Let’s create a base.html file at the following location: url_shortener/templates/url_shortener/base.html , update it with the below code.
<!DOCTYPE html>
<html lang="en">
<head>
    <meta charset="UTF-8">
    <meta http-equiv="X-UA-Compatible" content="IE=edge">
    <meta name="viewport" content="width=device-width, initial-scale=1.0">
    <title>{% block title %}URL Shortener{% endblock %}</title>
    <link href="https://cdn.jsdelivr.net/npm/[email protected]/dist/css/bootstrap.min.css" rel="stylesheet">
</head>
<body>
    {% include 'url_shortener/header.html' %}

    <div class="container">
        {% block content %}
        {% endblock %}
    </div>

    {% include 'url_shortener/footer.html' %}

    <script src="https://cdn.jsdelivr.net/npm/[email protected]/dist/js/bootstrap.bundle.min.js"></script>
</body>
</html>
Our next step is to create a header.html file at the following location: url_shortener/templates/url_shortener/header.html , update it with the below code.
<header>
    <nav class="navbar navbar-expand-lg navbar-light bg-light">
        <div class="container">
            <a class="navbar-brand" href="{% url 'index' %}">URL Shortener</a>
            <button class="navbar-toggler" type="button" data-bs-toggle="collapse" data-bs-target="#navbarSupportedContent" aria-controls="navbarSupportedContent" aria-expanded="false" aria-label="Toggle navigation">
                <span class="navbar-toggler-icon"></span>
            </button>
            <div class="collapse navbar-collapse" id="navbarSupportedContent">
                <ul class="navbar-nav me-auto mb-2 mb-lg-0">
                    <li class="nav-item">
                        <a class="nav-link" href="#">Show Short URLs</a>
                    </li>
                </ul>
                <ul class="navbar-nav">
                    <li class="nav-item">
                        <a class="nav-link" href="#">Sign Up</a>
                    </li>
                    <li class="nav-item">
                        <a class="nav-link" href="#">Sign In</a>
                    </li>
                </ul>
            </div>
        </div>
    </nav>
</header>
Now, we can create footer.html file at the following location: url_shortener/templates/url_shortener/footer.html , update it with the below code.
<footer class="footer mt-auto py-3 bg-light">
    <div class="container">
        <span class="text-muted">© 2024 URL Shortener. All rights reserved.</span>
    </div>
</footer>
Updating index.html file which we created in the previous article. The location of the file is url_shortener/templates/url_shortener/index.html
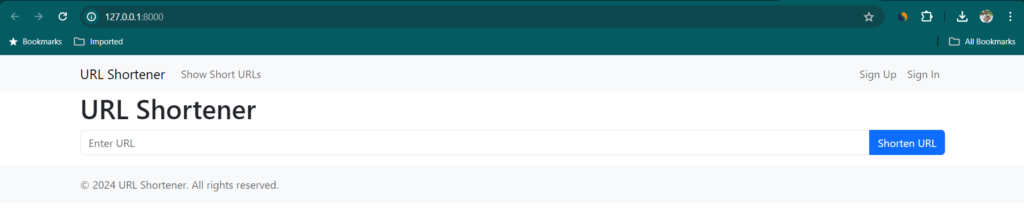
Let’s run the Django server by running the “python manage.py runserver” command. You can launch the website at 127.0.0.1:8000, you can notice the improvement immediately. Here is an image for your reference.
User Authentication
Enabling user authentication in Django involves several steps. Here’s a simplified guide to get you started:
- Update settings.py: Add
'django.contrib.auth'to theINSTALLED_APPSlist. - Run migrations: Execute
python manage.py migrateto create the necessary database tables for authentication. - URLs configuration: Set up URLs for authentication views. You can use Django’s built-in authentication views or create custom views.
- Templates: Create templates for login, logout, signup, password reset, etc., if you’re using built-in views.
- Views: Implement views for signup, login, logout, password reset, etc., if you’re creating custom views.
- Forms: Create forms for signup, login, and password reset, if needed.
Since user authentication is a big topic, let’s focus on this dedicatedly in our next article.